- 이번에는 지금까지 작성했던 자바스크립트, 리액트 코드를 정리하고, 스타일을 만들 것이다.
- <form> 태그에서 수행하는 기능은 컴포넌트를 따로 만들어 관리하는 것이 보기 좋다.
우선 Home.js의 form을 따로 관리할 TweetFactory.js를 컴포넌트 폴더에 생성했다.


- 아래와 같이 Home의 코드를 옮겨 주고
// TweetFactory.js
import React, {useState} from "react";
import { dbService, storageService } from "myFirebase";
import { v4 as uuidv4 } from "uuid";
import { uploadString, getDownloadURL, ref } from '@firebase/storage';
import { addDoc, collection } from 'firebase/firestore';
const TweetFactory = ({userObj}) => {
const [tweet, setTweet] = useState("");
const [attachment, setAttachment] = useState("");
const onSubmit = async (event) => {
// 아무것도 입력하지 않는 행위 방지
event.preventDefault();
let attachmentURL ="";
if(attachment !== "") {
// 파일 경로 참조 만들기
const fileRef = ref(storageService, `${userObj.uid}/${uuidv4()}`);
// 스토리지 참조경로로 파일 업로드하기
const response = await uploadString(fileRef, attachment, "data_url");
// 스토리지 참조 경로에 있는 파일의 URL을 다운로드해서 변수에 넣고 업데이트
attachmentURL = await getDownloadURL(fileRef);
}
// tweets collction에 tweet내용과 작성시간을 담은 Doc을 add
const tweetObject = {
text: tweet,
createdAt: Date.now(),
creatorId: userObj.uid,
attachmentURL,
};
await addDoc(collection(dbService, "tweets"), tweetObject);
// add한 이후 tweet을 빈 문자열로 초기화
setTweet("");
// 파일 미리보기 img 비우기
setAttachment("");
};
const onChange = (event) => {
const {
target: { value },
} = event;
setTweet(value);
};
const onFileChange = (event) => {
const {
target:{ files },
} = event;
const theFile = files[0];
const reader = new FileReader();
// 파일 로딩이 끝남을 받는 event listener
reader.onloadend = (finishedEvent) => {
const {
currentTarget: { result },
} = finishedEvent;
setAttachment(result);
}
reader.readAsDataURL(theFile);
};
const onClearAttachment = () => setAttachment(null);
return (
<form onSubmit={onSubmit}>
<input
value={tweet}
onChange={onChange}
type="text"
placeholder="what's on your mind?"
maxLength={120}
/>
<input
type="submit"
value="Tweet"
/>
<input
onChange={onFileChange}
type="file"
accept="image/*"
/>
{
attachment && (
<div>
<img src={attachment} width="100px" height="100px" />
<button onClick={onClearAttachment}>Clear</button>
</div>
)
}
</form>
);
};
export default TweetFactory;
// Home.js
- Home에서 prop으로 userObj를 넘겨주어야 한다.
import React, { useEffect, useState } from "react";
import { dbService, storageService } from "myFirebase";
import { addDoc, collection, getDocs, orderBy, query, onSnapshot } from "firebase/firestore";
import {getDownloadURL, ref, uploadString} from "@firebase/storage";
import Tweet from "components/Tweet";
import TweetFactory from "components/TweetFactory";
// for Home import
const Home = ({ userObj }) => {
const [tweets, setTweets] = useState([]);
/*
const getTweets = async () => {
const dbTweets = await getDocs(collection(dbService, "tweets"));
dbTweets.forEach((document) => {
// tweet의 구조
const tweetObject = {
...document.data(),
id: document.id,
};
setTweets((prev) => [tweetObject, ...prev]);
});
}
*/
useEffect(() => {
//getTweets();
const q = query(collection(dbService, "tweets"), orderBy("createdAt", "desc"));
// arr를 만들어준다음 setTweets 하는 방법
onSnapshot(q, (snapshot) => {
// snapshot은 listener라고 생각하면 됨
const tweetArr = snapshot.docs.map((document) => ({
id: document.id,
...document.data(),
}));
setTweets(tweetArr);
})
}, []);
return (
<div>
<TweetFactory userObj={userObj} />
<div>
{tweets.map((tweet) => (
<Tweet key={tweet.id}
tweetObj={tweet}
isOwner={tweet.creatorId === userObj.uid}
/>
))}
</div>
</div>
);
};
export default Home;
- 코드를 정리한 후 잘 작동하는지 확인하자.

- 모든 기능이 잘 작동한다.
- 다음으로는 Auth.js를 정리해보자.
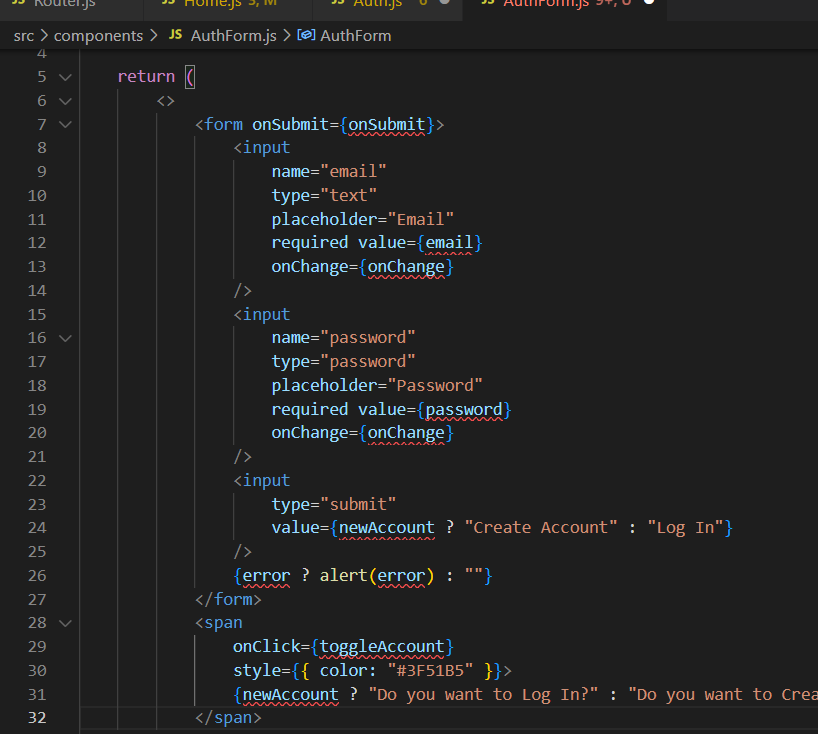
컴포넌트 폴더에 AuthForm.js를 생성하고 form과 span을 옮긴다.
여기서는 두 가지를 랜더링 하기 때문에 fragment (<></>)를 반드시 사용해 주어야 한다.

- Auth는 prop으로 받아오는 인자가 없으므로 태그만 적도록 하자.

// AuthForm.js
import React, {useState} from "react";
import { createUserWithEmailAndPassword,
signInWithEmailAndPassword,
getAuth
} from "firebase/auth";
const AuthForm = () => {
const [email, setEmail] = useState("");
const [password, setPassword] = useState("");
const [newAccount, setNewAccount] = useState(false);
const [error, setError] = useState("");
// Input Change 감지
const onChange = (event) => {
//console.log(event.target.name);
// 이벤트로부터 name을 받아서 email OR password set하기
const {target: {name, value}} = event;
if(name === "email") {
setEmail(value);
}
else if (name === "password") {
setPassword(value);
}
};
// async로 바꿔주기
const onSubmit = async (event) => {
// form 제출 값이 default인 것을 방지
event.preventDefault();
try {
let data;
const auth = getAuth();
if(newAccount) {
// 계정 생성
data = await createUserWithEmailAndPassword(
auth,
email,
password
);
}
else {
// 로그인
data = await signInWithEmailAndPassword(
auth,
email,
password
);
}
console.log(data);
}
catch(error) {
// 에러탐지시 메시지 설정
setError(error.message);
}
};
// newAccount의 이전 값을 가져와서 반대되는 값을 리턴
const toggleAccount = () => setNewAccount((prev) => !prev);
return (
<>
<form onSubmit={onSubmit}>
<input
name="email"
type="text"
placeholder="Email"
required value={email}
onChange={onChange}
/>
<input
name="password"
type="password"
placeholder="Password"
required value={password}
onChange={onChange}
/>
<input
type="submit"
value={newAccount ? "Create Account" : "Log In"}
/>
{error}
</form>
<span
onClick={toggleAccount}
style={{ color: "#3F51B5" }}>
{newAccount ? "Do you want to Log In?" : "Do you want to Create Account?"}
</span>
</>
);
};
export default AuthForm;
- 마친가지로 코드 작성 후 제대로 작동하는지 테스트 하자
728x90
'Firebase' 카테고리의 다른 글
| Firebase를 사용한 트위터 클론 코딩#16(Update Profile) (0) | 2022.08.25 |
|---|---|
| Firebase를 사용한 트위터 클론 코딩#15(Indexing For Profile) (0) | 2022.08.25 |
| Firebase를 사용한 트위터 클론 코딩#14(Upload & Delete Tweets With Images) (0) | 2022.08.15 |
| Firebase를 사용한 트위터 클론 코딩#13(Preview Images) (0) | 2022.08.13 |
| Firebase를 사용한 트위터 클론 코딩#12(Delete & Update) (1) | 2022.07.30 |